What is Azure Automated ML?
The goal of Automated ML is to help you find the best model based on your data without writing a single line of code.
Creating custom Machine Learning systems requires making choices about several things such as:
- Models to choose
- Hyperparameters
- Configuration details
The optimal choices a developer makes based on the problem being solved (along with the dataset) lead to state-of-the-art Machine Learning system performance.
The number of options that a designer must make, especially if done manually, can lead to wasted cycles and high costs just to run a single experiment (e.g. training a deep neural network in particular).
Azure Automated ML tackles these problems by designing probabilistic Machine Learning models to help build models quickly and with fewer cycles of experimentation.
Some specific problems Azure Automated ML focuses on are:
- Neural architecture search – A technique to help automate the design of artificial neural networks (ANN).
- Feature Engineering – For example, instead of using variables x, y, z, you decide to use log(x)-sqrt(y)*z instead, because your engineering knowledge tells you that this derived quantity is more meaningful to solve your problem. You get better results with it.
Note: For a difference between Feature Engineering vs Feature extraction visit here:
- Model Compression – Its goal is to deploy state-of-the-art deep networks in low-power and resource limited devices without significant drop in accuracy
How to use Azure Automated ML?
In addition to using Azure Synapse, you can access features of Automated ML using Microsoft Azure Machine Learning Studio.
For both methods of accessing Automated ML features (Azure Synapse and ML Studio), you must have an Azure Machine Learning Workspace.
To access Automated ML inside ML Studio
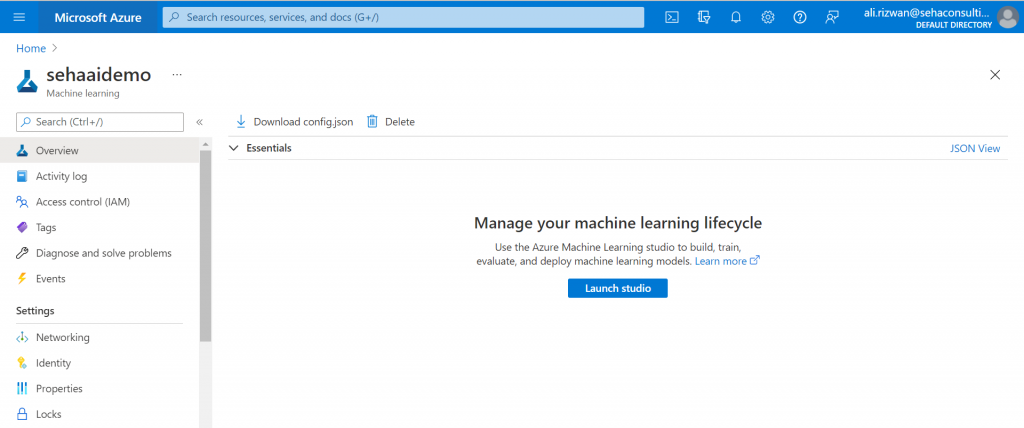
It is easy to get to the ML Studio directly from the workspace as shown:
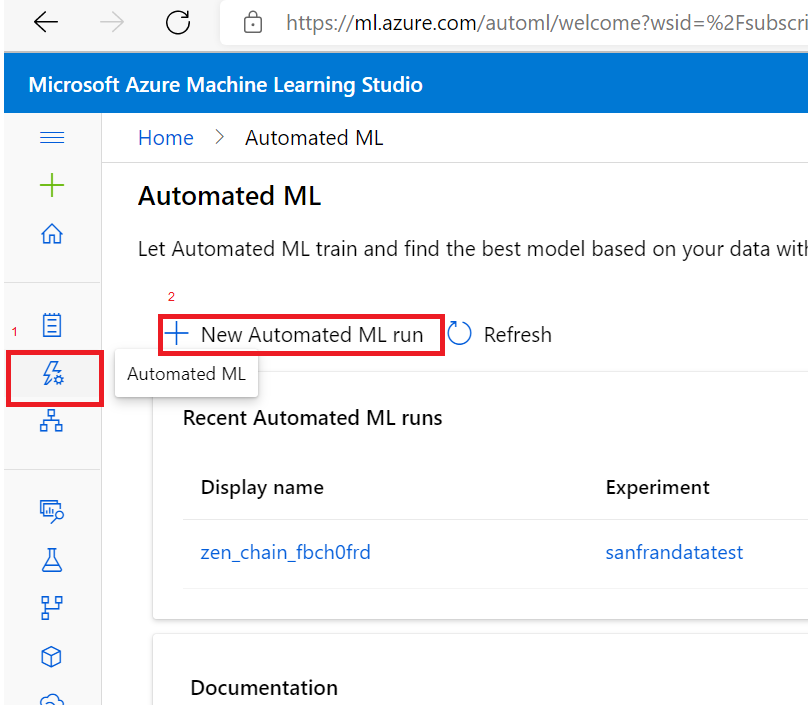
Inside ML Studio go to the:
- First highlighted box on the left-hand menu and select the Automated ML tab.
- Once on the Automated ML page you can run new Automated ML Runs.
Set up the Automated ML Run
There are 4 steps to creating an Automated ML Run:
- Select dataset
- Configure Run
- Select task and setting
- Validate and Test (optional)
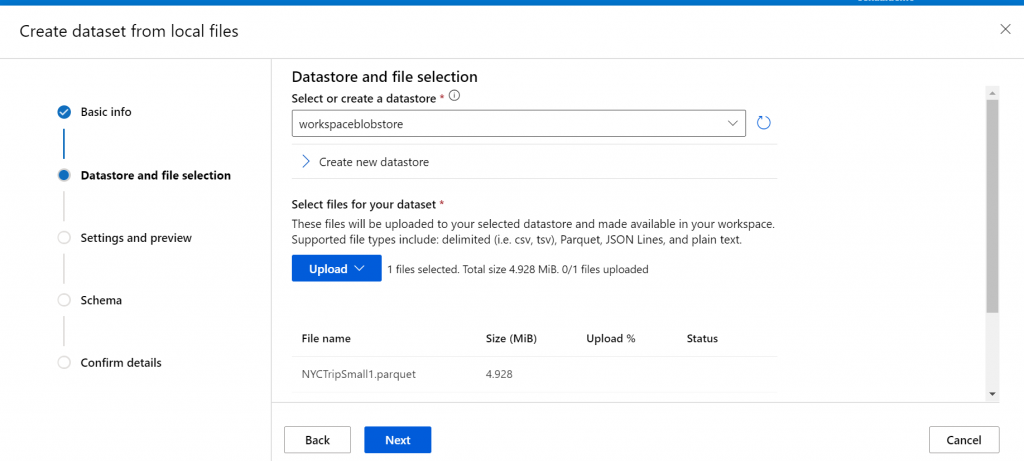
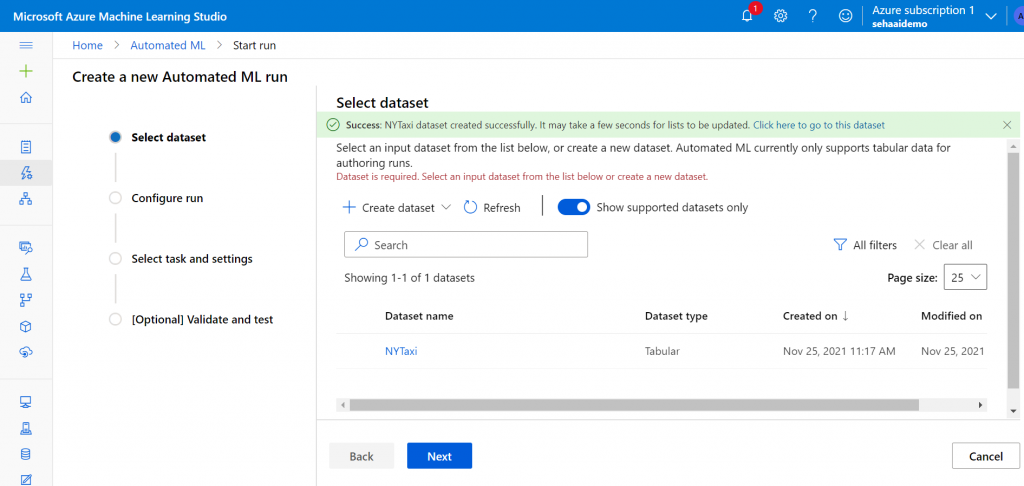
- Select dataset – Using ML Studio you must first create and register a dataset and the dataset must be in a tabular format. In the example below I upload a local file for NYTaxi Data.
Upon doing so the data is available in the list of options to pick:
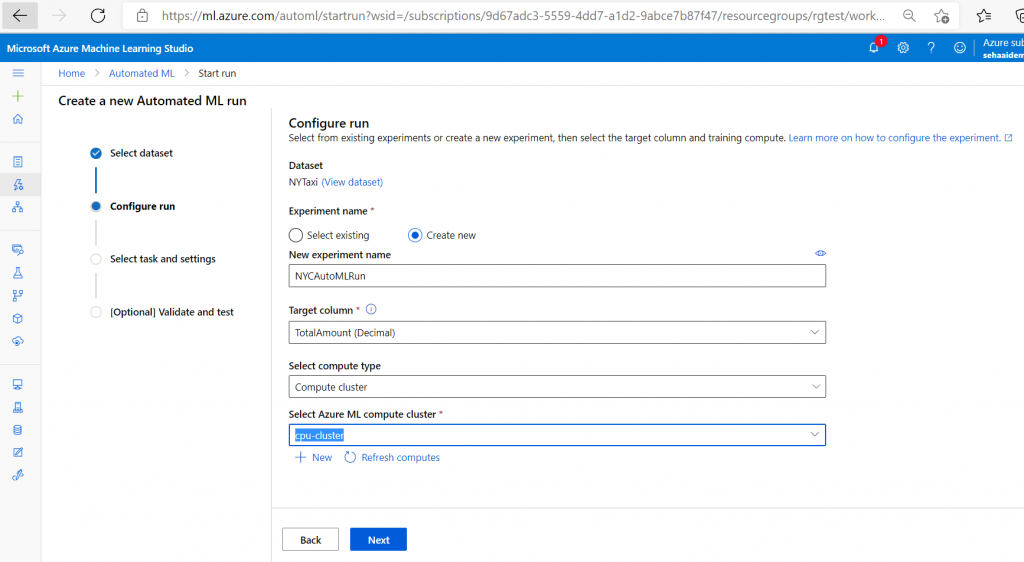
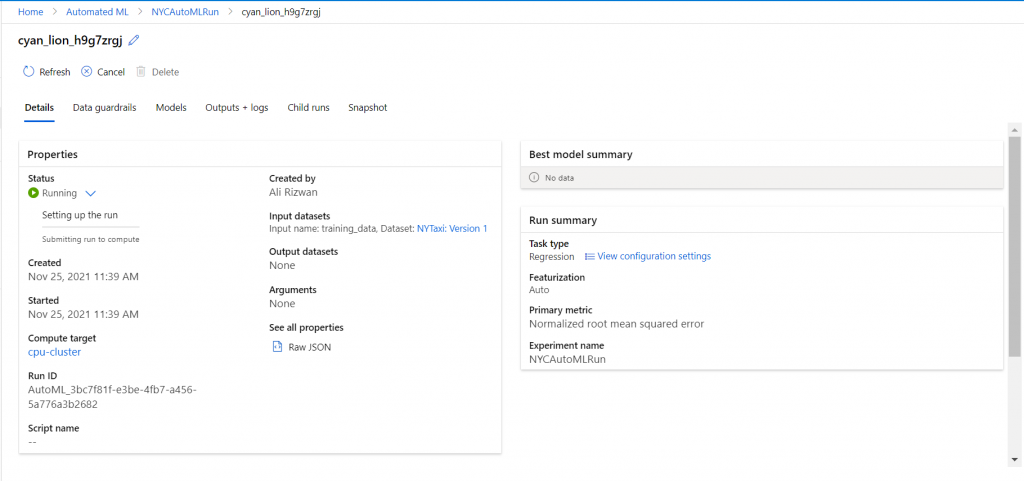
- Configure run- In this step you configure the column you are trying to predict, give an experiment name (or use an existing experiment) and specify the compute to use.
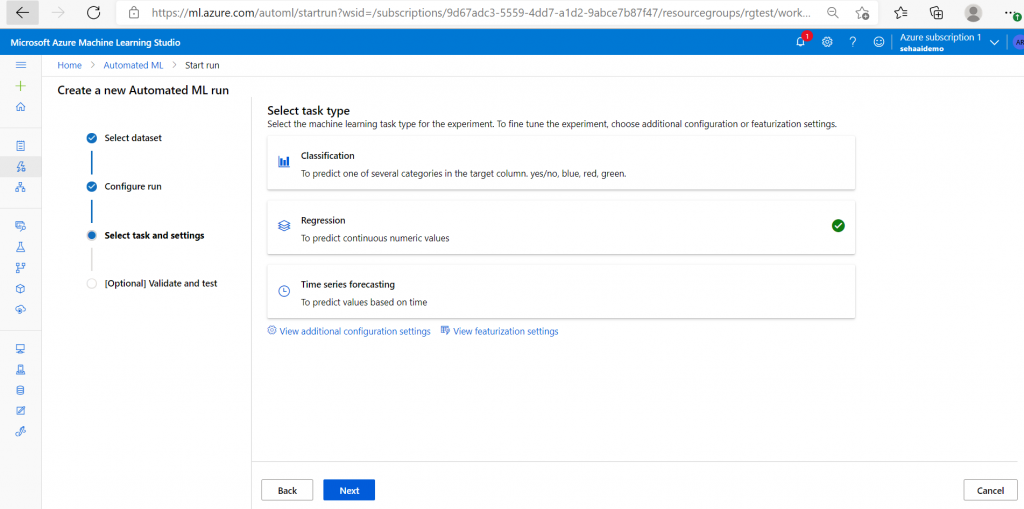
- Select task and setting- In this step we have three options to select the type of run we want to perform based on our data: Classification, Regression, and Time-series forecasting. If you look in our previous step, we set the Target Column as a decimal number “TotalAmount” of the fare for a given taxi ride. Because of the attributes of the column, Automated ML gives us a preselected recommendation on the type of run we should configure:
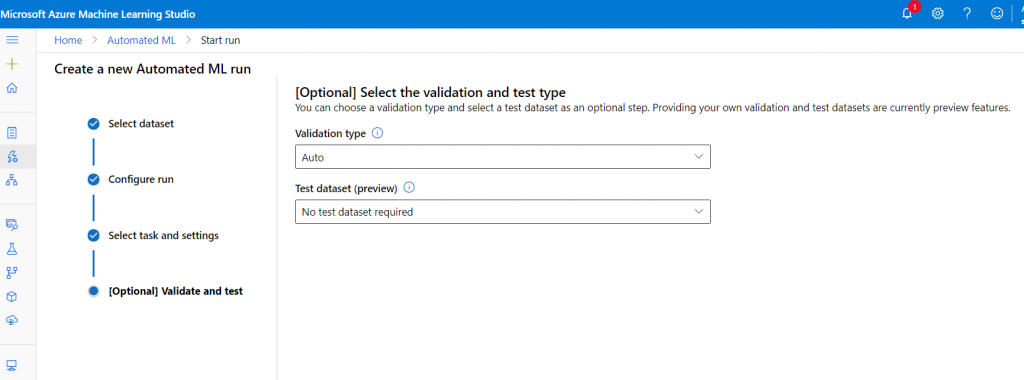
- Validate and Test Dataset (Optional)- you can set up how the model validation will be performed and if you want to provide test data.
If you want to provide test data, you can provide a separate dataset for testing as shown below:
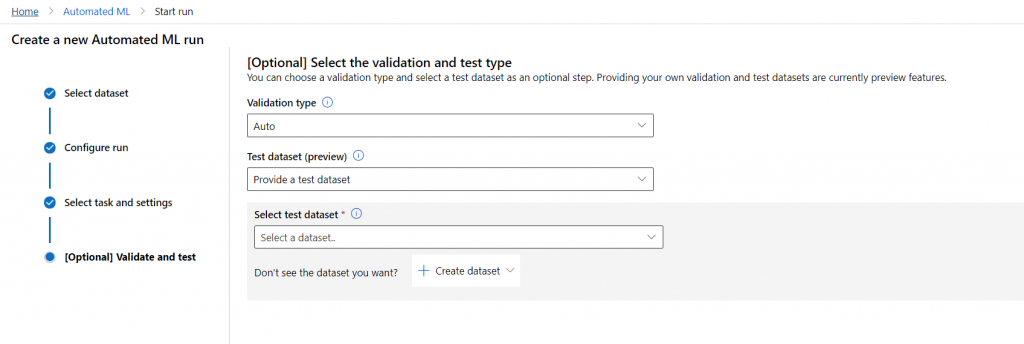
OR take a portion of the training data to be used as the testing data as in the below screen shot.

Just like that, you can provide a test run to find the best models that will produce the best outcome for your problem given your dataset.
Integration of Automated ML with Azure Synapse
The Azure ML integration is just one function that we will cover in this blog. For more details about Azure Synapse and its purpose and features, you can view a previous video on the topic here. Azure Synapse is a much broader tool and isn’t just limited to AI and ML usage but rather has many features and facets that one should be aware of.
Azure Synapse is a place where you can work on multiple sources of data in one location to perform data ingestion, data preparation, and data visualization with various storage and processing pools.
The benefit of integrating Automated ML with Azure Synapse is that while working inside Azure Synapse with its storage options you don’t need to re-register that data in Azure Machine Learning to use that data to perform the functionality of Automated ML.
The goal of Azure Synapse is to be a one-stop-shop and this integration is one step closer to getting us there.
Pre-requisites for Integration
To implement the integration between Azure Synapse and Azure Machine Learning and Automated ML you must first have the following:
- An Azure Machine Learning Workspace
- An app registration- To do this go into Azure Active Directory -> App Registration and create a new app registration. As part of this step, you must have the Client Secret and Client ID set up and saved before you begin the steps of integration. This will be needed in the step when you go into Azure Synapse Studio and create the Linked Service between the two services.
- An Azure Synapse Workspace
Once the above steps are completed you can
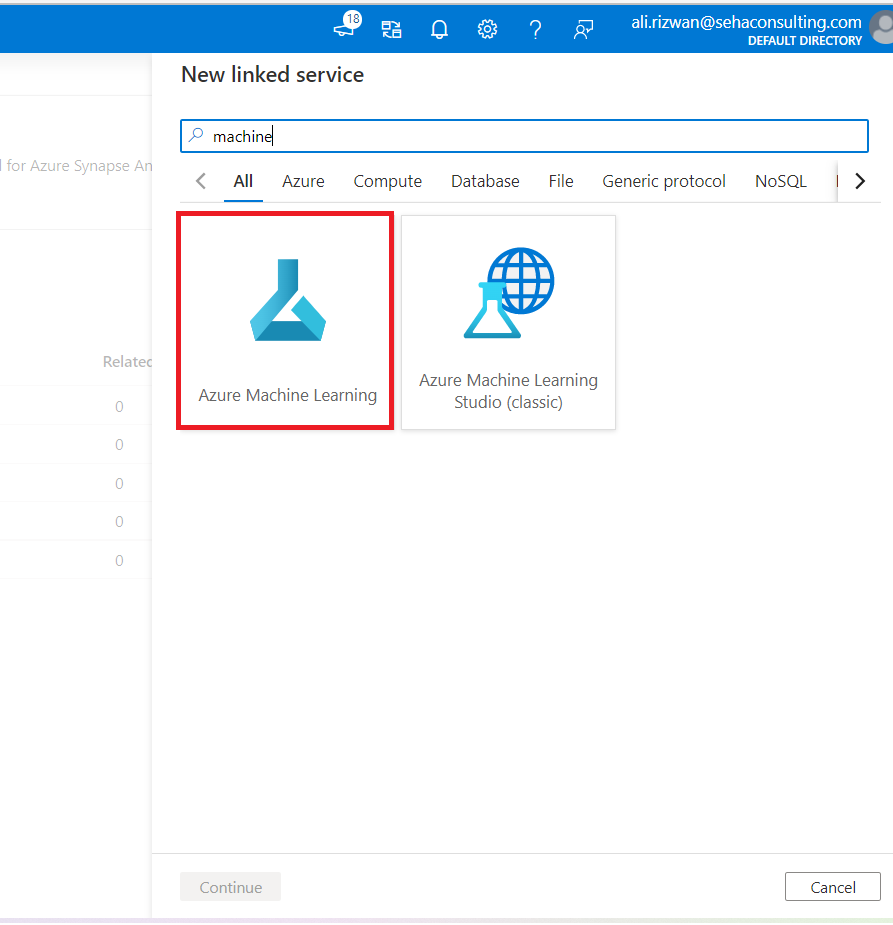
- Go into Azure Synapse Workspace and to Linked Services. These are objects which are configured to connect to other sources and services. In this case, we will use Linked Services to connect to Azure Machine Learning for Automated ML, but it can also be used for Power BI integration with Azure Synapse.

- Click on +New and an options window appears on the right-hand side of the screen. Search for Azure Machine Learning and select it.
- Choose a name and integration runtime. For the “Authentication method” I chose “Service Principal”.
- For the “Azure Machine Learning workspace selection method” I chose “From Azure Subscription” so I can reference the Azure Machine Learning workspace I created in the previous step.
- For Service Principal ID, pick the client ID from the app registration step.
- For Service Principal Key, pick the Client secret from the app registration step.
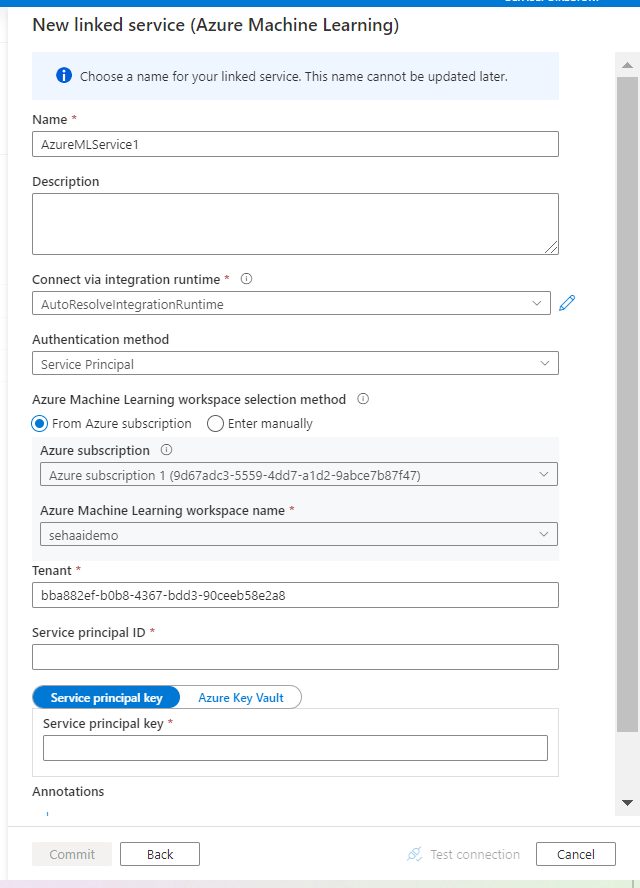
- Click “Commit”
- The Linked Service will appear (I also added nyc_tlc_yellow to show how we can use this data to perform predictions)
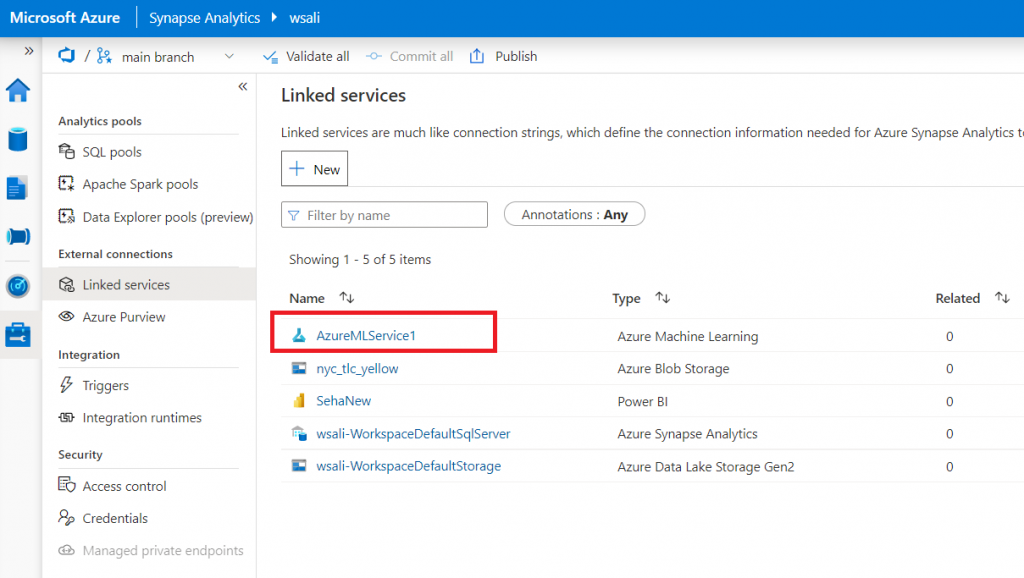
- Once done you can open the Linked Services and “Test connection”

- Once the Linked Services is created it can then be used to make predictions about data from inside Azure Synapse Studio without going into Azure Machine Learning workspace.
Use existing models to make predictions about data in Dedicated Pools using Azure Machine Learning
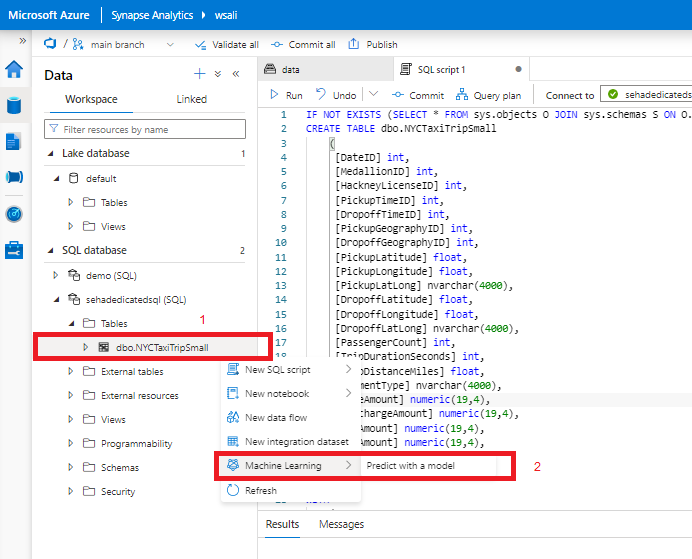
Note: To use the Automated ML experience, we must use Spark Tables. With Dedicated SQL pool tables, you can only train data in those tables with preexisting models but not perform new Automated ML experiments.
- Step 1: Right Click on the dataset (in my case it is in a dedicated SQL pool which I used to perform the test)
- Step 2: Click on Machine Learning (Note: This option is only available for datasets in workspaces where you have integrated Azure Machine Learning within Azure Synapse)
- Click on “Predict with a model”
- This will pull up existing models which you have in the Azure Machine Learning workspace for us to work with the dataset.
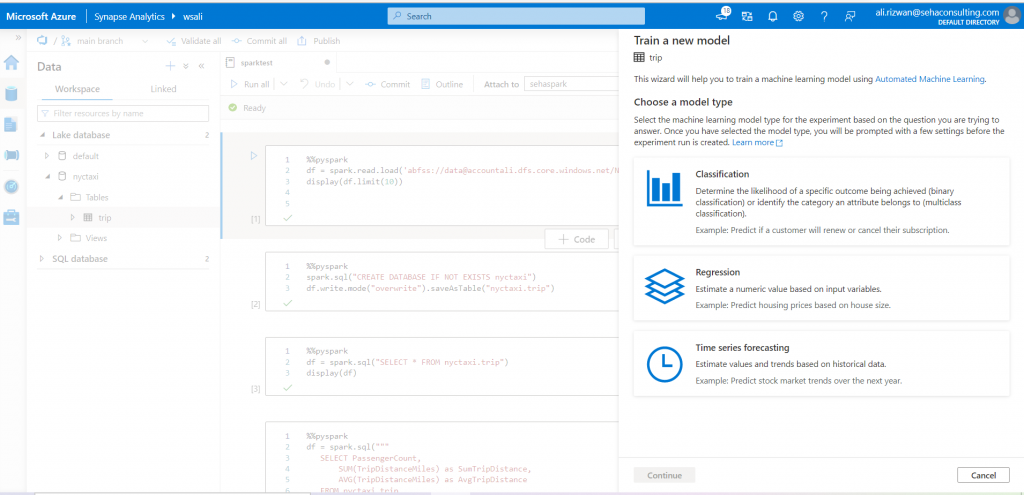
Next, we will create a spark table and show you the same steps we did in Azure Machine Learning on our NY Taxi dataset in Azure Synapse Workspace.
- Go into Spark table created from the “NYCTaxiSmall1.parquet” datafile.
- Right-click on the table name and select Machine Learning -> Train a New Model

- Upon doing this the same UI we saw in Azure Machine Learning for Automated ML will appear on the right-hand side.
In conclusion, Azure Synapse and Azure Machine Learning provide a solid foundation of low code/no code experience for developers. Users of Azure can leverage data already being utilized inside Azure Synapse and curate it further with capabilities in Automated ML by integrating to Azure Machine Learning as a Linked Service. There will be more to come on these feature sets in the future.